The Ultimate Guide to a Pro-level Zoom Setup
I’m not good at sales. I’m not confident.
But I’m a lot more confident when my Zoom setup is 5x better than any of my clients.
I’ve sold millions worth of high-ticket sales using Zoom. You can turn an embarrassing Zoom environment into a solid Zoom virtual sales experience even when you’re on a budget.
In this guide, I give you everything you need to know, how I built my setup and how you can too (with links to everything you’ll need).
What We’ll Cover
My Zoom Setup
I have the best Zoom setup I can afford – here’s what it looks like:
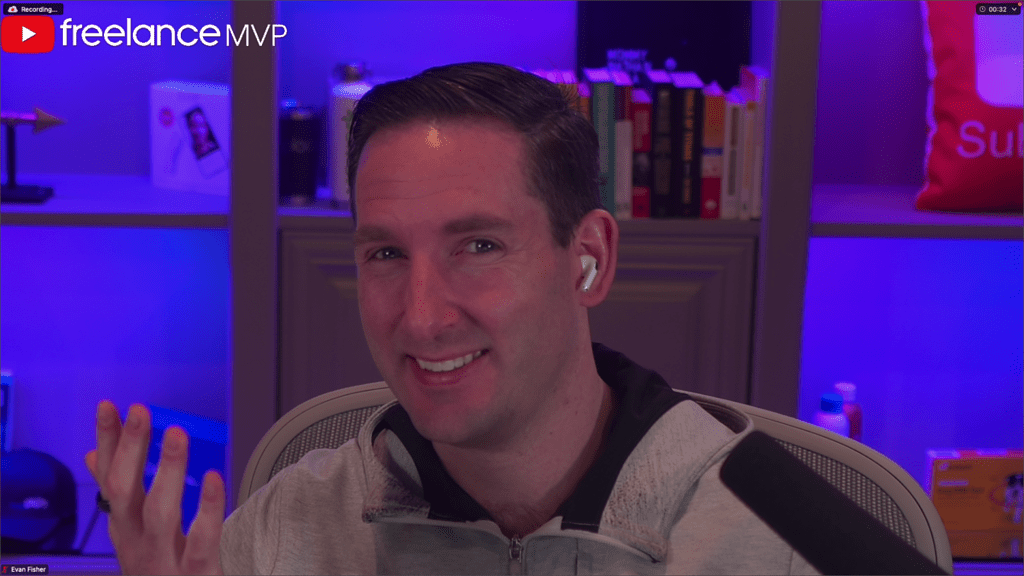
I invested the time, money & effort into upgrading my Zoom video conferencing setup to the best it could possibly be, and clients pay more because I take it seriously.
But just because I put money into my Zoom setup, doesn’t mean you have to break the bank making yours awesome.
No matter whether you’re just starting out making money online or are ready to invest in the ultimate Zoom virtual sales setup, this guide is for you.
Essentials For Every Zoom Virtual Sales Setup
The main elements of every Zoom setup for selling:
- Solid Internet Connection
- Decent Microphone
- Headphones
- Webcam / Camera
- Good Lighting
- Clean Background
- Soundproofing
The Best Zoom Setup Under $100
When I first started selling through Zoom, I was on a super-tight budget, so I had to make my dollars stretch as far as they could – especially since Zoom was a key part of the path to winning jobs and making money online.
So I made do with the essentials, and built a basic Zoom setup on a budget that solved for my main problems: terrible wifi, voice echo, scratchy microphones, awkward camera angles and washed-out video.
Solving Zoom Wifi Issues = Increasing Earnings
When I first started freelancing, I was in an apartment that had an infuriating wifi mesh system.
The network always put me on the wrong node, and the speeds were horrendous. I would constantly experience call stutters, video instability and even drop Zoom calls.
That’s a problem. No one likes repeating themselves over and over. If it’s difficult to communicate with you, you’ll probably lose the job over someone the potential client finds it easier to communicate with.
When you’re in virtual sales, your ability to earn (and your likelihood to win a contract) is directly dependent on your network connection stability. Wherever possible, always use a wired internet connection as a top priority.
If you’re not able to be on a wired connection, then it’s polite to start the call on video, say hello, then,
“Heads up, the connection’s not great so I’m going to go off of video to save bandwidth.”
Everyone on the call will thank you for it.
But before you say “I can’t do a wired connection,” consider this: when I started Zoom virtual sales in freelance career, my apartment had two floors.
The router was upstairs on one end of the apartment, and my home office was downstairs on the other end of the apartment (as far as it could possibly be).
Having a stable internet connection is so valuable that I literally bought a custom 100-foot Cat 6 ethernet cable, and ran it along the floor, down the stairs, through the hallway to the other side of the apartment – just so I could have a stable connection for my video calls.
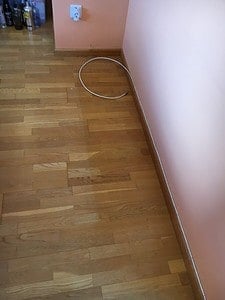
Remember, many regions have one-tap dial-in numbers that get sent with the Zoom invite so you can always dial into Zoom but should really only do so in case of emergency.
In all other cases, you should probably start by buying a long ethernet cable so you can permanently achieve maximum internet speed on the calls that will make you money.
Use Headphones To Eliminate Zoom Voice Echo
In the first few Zoom meetings I ever did, I didn’t use headphones. Potential clients I spoke with complained about “hearing themselves through my speakers,” so I took a pair of headphones I had lying around, and plugged them in.
In most cases, voice echo on Zoom is caused by speakers outputting sound that is then captured by a microphone. Using headphones eliminates voice echo by ensuring that the sound produced within the Zoom meeting goes directly into your ear, and is not picked up by a microphone.
For a budget Zoom setup, you could use any set of headphones you have available, but if you need to buy a pair, I would recommend these Sony Wired Earbuds (currently $8 on Amazon).

Great sound, they’re not bulky headphones, there’s no charging required, and it doesn’t break the bank.
Use An External Microphone, Not The Headphone Mic
There’s a reason the earbuds I recommend don’t have an inline microphone.
After my first few Zoom meetings using the headphones I had lying around, a couple of potential clients asked me a strange question: “What’s that noise? I hear something scratching…”
Every time a potential client mentioned this scratching, I just brushed it off – even though I was secretly incredibly embarrassed. I had no idea what was causing the scratching… until I recorded a meeting and watched it back.
It turns out that my headphones had an inline microphone, and that mic was scratching against my clothes every time I shifted position in my chair or moved around.
And when I watched the recording, I realized that they were right: it was super annoying.
So naturally, my next fix was to get an external microphone.

I used the Blue Snowball for years – it’s a great starter mic for Zoom virtual sales.
It’s a USB microphone, meaning it’ll plug directly into your computer without extra hardware in-between. At roughly $40 right now, it’s one of the best budget microphones out there.
I personally don’t recommend desk stands for Zoom calls, since they tend to pick up annoying keystrokes and desk pops. You can make any mic sound better by bringing it closer to your mouth with a pop filter and boom arm, which are also both relatively inexpensive upgrades that turn a good mic, into something that sounds really great.
Add Boxes Or Books To Get A Better Angle
Most laptops have an integrated webcam, but isn’t it weird when you’re on Zoom with someone, and they look like they’re looking somewhere else?

It’s distracting when you’re on a Zoom call, and the other person has Zoom set up on a second monitor.
Luckily, there’s a simple solution to making good eye contact in a Zoom call, without having to buy an external webcam:
Put a box or stack of books at the back of your desk so that your integrated camera is at roughly eye level. Whenever you are going to do a Zoom sales call, set your laptop on the box so that you can get a more head-on camera angle.
Instant eye contact.
Fix Your Background
Everyone hates the person who sits in front of the window on a Zoom meeting.

We cannot see you!
When you sit with your back to a window and it’s bright outside, the light overpowers most built-in webcams.
The simple solution to a much better Zoom experience:
Turn your desk, or choose a different spot that has less light streaming into the background. If you can’t change your spot, hang some blackout curtains over the window – they’re very inexpensive but go a long way toward improving your video.
Blackout curtains were one of the best investments I made early in my freelance journey.
Fix your Zoom background for Free
- Open a private Zoom
- Look at everything in the Zoom frame that is NOT your face
- Clean up your background
- Once it’s clean, then add to the ambiance. My top picks would be a couple of fake plants, flowers, some picture frames or other things you might have in the house for décor
Upgrade Your Zoom Lighting The Cheap & Easy Way
Next, we need to get some balanced light on your face.
Most recommend achieving good face lighting by sitting facing a window – but the problem most people then have is light inconsistency.
In my case, I was taking calls at different times of day, some days would be cloudy or rainy, and in many cases the light would be shining in my eyes for hours on end (my window faced south).
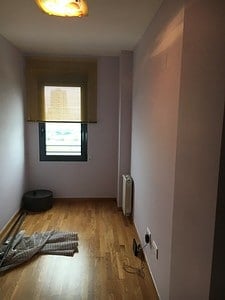
Some calls would be at night, which meant I had to use the room’s overhead lights, casting ugly shadows on my face.
You can upgrade your Zoom lighting on a budget by getting two dimmable desk lamps with flexible stems.

If you get a different kind that uses bulbs, be sure to get dimmable LED bulbs.
I made this mistake: since most LED bulbs aren’t dimmable and the dimmable ones were more expensive, stupd me bought halogen bulbs.
Bad decision. The halogen bulbs got really hot and were pretty unpleasant when they were shining in my face.
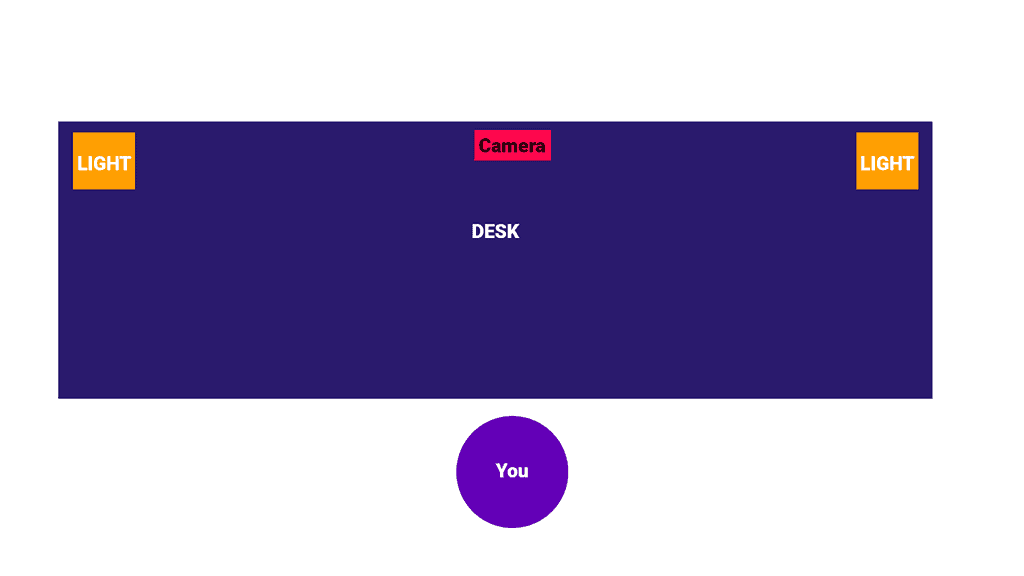
Set dimmable desk lamps at the left and right corners of your desk, point them toward your face and adjust the brightness to achieve consistent light across your face without shadows since the light sources are angled properly.
Intermediate: Upgrading Your Zoom Setup For Virtual Sales
The budget setup will serve you for a long time, but once you’re selling and making money, it’s time to step up your Zoom quality even further.
Upgrade Your Microphone
A solid-quality microphone is a big deal, since crystal-clear audio quality is important (and highly valued by potential clients) when you sell virtually with Zoom.
When it’s time to upgrade past a basic setup – but you’re not ready to “go pro” yet – then stick with a USB mic unless you’re certain you’ll eventually upgrade to a pro-level XLR system.
Value & Reliability: USB Microphone ($120)
Your best bet for reliability is a USB microphone. The Blue Yeti is tried-and-true, and it has all the key functions you’ll need in order to get great audio quality. Together with its pop filter, you can have a great Blue Yeti setup for under $120.
Futureproof Upgrade: Starter USB/XLR Microphone For Zoom ($260)
If you’re certain you’re going to eventually upgrade to a pro-level XLR microphone, then your first stop when going XLR is the Shure MV7 and its windscreen. It’s more expensive than most USB options, but the MV7 is incredibly high quality and it’ll serve you well for a long time before you need to upgrade.
When you want to upgrade to XLR, if you have an MV7 you won’t have to “start over” and buy a new microphone immediately, since the MV7 can work with either USB or XLR setups.
Remove Echo With Soundproofing ($40-$200)
If you’re in a carpeted room, that’s awesome. When I started, my office had a hardwood floor, big uncovered windows and hardwood floors. The echo was terrible.
You can reduce Zoom call echo from hardwood floors by laying down an area rug.
Dense rugs diffuse sound better than thin rattan-style rugs. Sound waves also bounce off of flat surfaces such as windows and bare walls, so using curtains on windows and adding a bookshelf to your office can help tremendously in removing echo.
You can solve a hardwood floor problem with an inexpensive area rug.

If you haven’t already installed blackout curtains, now is the time to do it.
Bookshelves are great because in addition to diffusing sound fairly effectively, they also add a nice aesthetic element to your office and be a nice addition to a clean video background. It all depends on your office vibe, but at a sub-$40 price point this bookshelf is extremely inexpensive, and is actually covered in cloth which diffuses sound better than wood would.

Limit Background Noise (FREE-$20)
Background noise is super-annoying. I can’t stand outside noise when I’m on a Zoom meeting.
If you just can’t be in a quiet place, there’s two things you need to do:
- Adjust Zoom’s Noise reduction settings. Test your noise reduction by recording a meeting and listening to the quality. [don’t worry, we’ll fix this intralink soon]
- Mute is your BEST FRIEND, but you have to have your hotkeys set up, so enable global shortcuts. Even if your client is asking you a question while you’re looking at their website on mute, you’re not desperately trying to switch back to Zoom to unmute – you just use your shortcut to unmute, answer their question and go back on mute.
If you have lots of external noise that leaks into your office from outside, then install a door sweep – it’ll make a big difference.
Quality 3-Point Lighting Is A Huge Zoom Upgrade ($210)
To take your lighting up to the next level, you don’t need to spend a fortune.
First, you’ll need your key light and fill light – these are the two main lights shining on your face. I’ve used this set of lights by Neewer for years, and they’re all you’ll need to drastically improve your lighting quality.

To get the perfect hair light, if you have recessed lighting over your desk, you can use a Philips Hue bulb that lets you change brightness & color temperature.
If you don’t have recessed lighting, then set up a dimmable desk lamp behind you (but out of frame) pointing at the back of your head so that your hair is illuminated and your shoulders have a clear outline.
Ultimate Zoom Setup For Virtual Sales: Raise Prices By 100%+
From a practical perspective, a pro Zoom setup creates a lasting impression because when you’re selling virtually, Zoom video quality matters and you only get one chance at a first impression.
It says that you’re a professional, you value your interactions with clients, and that you mean business – and it communicates you’re a market leader in your niche.
Huge thanks to Caleb from DLSR Video Shooter for the inspiration on this Pro-level Zoom build that has received countless comments of praise from clients and even 500K+ subscriber Youtubers.
Get A Pro XLR Microphone Because Clients Pay More For Quality
A serious Zoom sales build requires a serious microphone – but bear in mind that different microphones solve different problems.
Cardioid XLR Mics Will Work For Most Zoom Setups
Cardioid microphones are the most common microphone you’ll encounter and will work incredibly well for most Zoom sales setups.
The Shure SM7B is the podcaster standard. Superstar streamers swear by it. With the SM7B, you will also want a Cloudlifter to amplify the signal so you don’t need to turn up the gain so much.

A slightly less-expensive alternative with incredible sound is the Logitech Blue Sona.
Have Background Noise Issues? Get A Shotgun Mic ($400-$1000)
If you have some aggressive, recurring background noise, try your best to eliminate it with soundproofing. If soundproofing won’t work, you might want a shotgun mic. Bear in mind that you might lose a bit of voice depth by using an out-of-frame shotgun mic, but that’s something you can equalize through software settings (and it makes your video frame just oh-so-clean).

When properly tuned, a shotgun mic can nearly eliminate the sound that comes from kids running through the hallway right outside your office (for example).
There are tons of shotgun microphone options available, with the Røde NGT 4+ a tremendous value. It’ll get you great sound quality, and it remains affordable with a price point of around $400.
But if you want the gold-standard “forever microphone,” then the Sennheiser MKH 416 is what I use on a daily basis. At $1,000, it is the most serious quality sound you can get. With the MKH 416, you probably won’t ever have to buy another microphone.
Ever.
Process Audio With A Budget-Friendly XLR Interface
In almost all cases, an XLR microphone will outperform a USB mic in terms of sound quality. But XLR mics need to have their signal translated into one that your computer can use.
Our recommended audio interface is as simple and as straightforward as it gets: the Focusrite Scarlett Solo is all you need.

The Boom Arm For The Best Zoom Setup ($90)
The old boom arm I was using for years was great – but was a little bit too short, not as adjustable as I wanted, and it just wasn’t holding position for my new, heavier XLR microphone.
If you’re investing in the best boom arm, there is only one to even consider: the Røde PSA-1 boom arm

So many people rave about this boom arm, and you know what?
Me too. I was like a kid on Christmas when this package arrived.
The Røde PSA-1 is exactly as incredible as the raving reviews say: it’s totally adjustable, customizable, has great cable management, the desk mount is out of this world, and the articulated arm is long enough to stretch across even the longest desks (mine is 72 inches long).
I swear by it. I considered doing a side-by-side review with other boom arms, but the PSA-1 is so good that I don’t think I really need to consider any others.
Just be careful when you unwrap it – it’s spring-loaded and many people have broken their computer monitors!
Get The Youtuber Look On Zoom With A Budget Pro Camera
I did tons of research on this. There were a few things I wanted:
- Works perfectly, even with a Mac
- Outputs 4K video (just in case I need mega-high def)
- Easy-to-find accessories
- Would get great video quality
- Would never break down, even if I left it on for say, 6 months (I’ve done that)
- That I could hard-wire
- That would be great for filming YouTube videos if I needed
- Wasn’t ridiculously expensive
The Sony A6400 is the best camera for a pro Zoom meeting setup.
It has all of the above. It isn’t overspec, or underspec – it’s the BEST you can get, without having to shell out over $3,000 for features you literally don’t need & will never use.
You’ll be able to use this setup to film almost any content you could imagine, in the highest resolution possible.
And your Zoom meetings will look sick.
Here’s your shopping list:
- Sony A6400 mirrorless camera body. Kit lenses are “no thank you”
- 64GB Standard SD card because your camera won’t work without it
- Dummy Battery so you can plug in your camera permanently (no battery issues)
- Sigma Camera Lens to get that beautiful blurry background look called bokeh
- 4K MicroHDMI-HDMI Cable to pass 4K video into your computer
- Elgato Capture Card to let your computer receive 4K video
Teleprompter + Monitor Lets You Look Clients In The Eye On Zoom
If you have a camera desk mount already, you can use that as a starter – but this is the part of the setup where the real magic happens.
Once I built this part of my setup, I got compliments over and over again on my Zoom setup – from paying clients. That’s how I got this:

Here’s what to do:
Use a teleprompter as an external monitor, so you can look directly at your camera while looking your Zoom meeting participants directly in the eyes.
Links to get your superstar teleprompter set up:
- 1x Glide Gear Teleprompter
- 1x Smallrig Tripod since the average desk camera mount won’t support the weight of the tripod setup, and you want some flexibility here
- 1x Lilliput A11 Monitor that you’ll use as an external monitor
- 1x 4K HDMI splitter
- 1x HDMI switch so you can hook up your monitor as an external Zoom screen you can look directly at
- 2x 10-foot HDMI cables
- 2x 6-foot HDMI cables
- 1x 3-foot HDMI cable
Don’t deviate from this list – I’ve spent countless hours getting this exactly right (with the right cables etc).
Here’s a demo of what this looks like in action:
Angle Your Background For More Depth
Most people (myself included) made the mistake of facing their camera toward a flat background.
It seems logical. Not angling your desk gives you the most space in a room.
But if you want a really great Zoom setup, get depth out of your background. This diagram is the only way I can explain it:
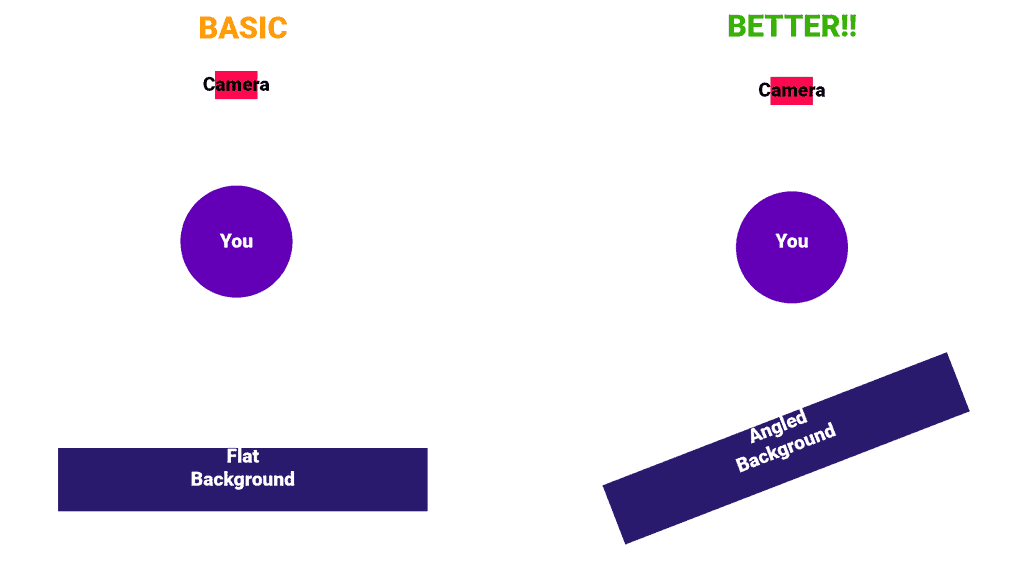
To achieve this, you’ll probably need to turn your desk, montor and camera setup so that your camera angle faces your background on an angle.
Automate Your Zoom Setup With Smart Lighting
I run my setup with Google Nest so it turns on automatically every workday, and all lights & gear operate on voice command. I also get the highest-speed wifi mesh across my entire house (wide area with lots of simultaneous HD video streaming on multiple devices at a time).
Honestly, it’s SICK. I’ve gotten compliments from other automation nerds on it.
If you want to go “full-auto” then here’s what to bolt on:
- Google Nest home wifi kit
- Smart power strips linked to Google Nest so I can turn them on/off with voice command or automation. Smart plugs can control your Neewer lights or any part of your setup on a routine
- Elgato lights are an upgrade to the Neewer lights I mentioned above
I love my Neewer lights, but the Elgato lights are on the list for a reason.
It’s because they integrate perfectly with the Stream Deck.
If You’re A Freelancer, You MUST Buy A Stream Deck

Stream Deck has been an insane time-saver.
I do a TON with my Stream Deck, including:
- Automate message responses (no more wasting time on freelance platform messages!)
- Template my emails
- Make Video Editing faster (by like 50%)
But the best part about a Stream Deck: native Zoom integration.
Stream Deck gives me a push-button for Zoom Mute/Unmute, Camera On/Off, Share Screen and more. Considering the amount of time I spend on Zoom, this is a LIFE SAVER.
If you’re a pro freelancer, you HAVE to get a Stream Deck.
Taking Your Setup To The Next Level
Next step: once you’ve got your setup in place, time to make some money with it.
Get the setup right so you knock it out of the park on every Zoom call.
Here’s where you can fine-tune your Zoom virtual sales strategy, and be closing high-ticket contracts in no time.
It’ll help you make every meeting a success and reduce your ghosted clients by up to 90%.
You’ll also want to tweak your settings to make sure you’re getting the most out of your setup. [don’t worry, we’ll fix this intralink soon]
This article originally appeared on freelancemvp.com, is copyright Freelance MVP LLC and is not authorized to appear anywhere else. If you have found this article anywhere else, it has been stolen – and that person’s Zoom setup probably sucks LOL


